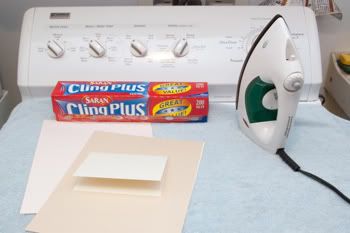
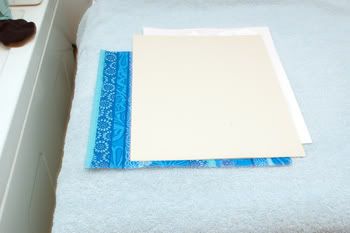
What you will need:
1. Saran wrap
2.2 pieces 8 1/2X11 medium weight card stock or something that can take the heat of an iron
3. scissors
4. folded blank card stock
5. An Ironing board(I don't own one so I used my washer covered with a towel:0)
6. A decorative napkin (not pictured here)
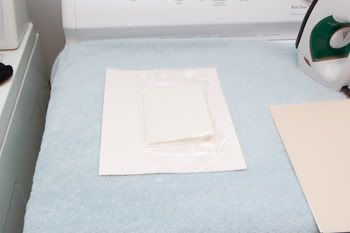
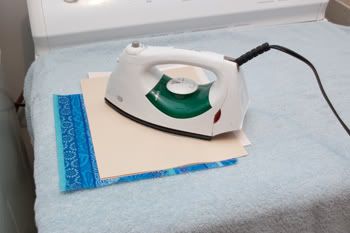
Place the saran wrap over your folded card stock. As tough as it is to keep the saran wrap from folding over on you, make sure it's flat and wrinkle free on the card stock. You may ask for help on this one...or you could just try to hold it with both hands and use your teeth to get the folds out like I do:)
The next step is really important! Usually decorative napkins come in two or three ply. Make sure you peel them off! Trust me, I forgot this step on one of the cards I made and it didn't work. Doh!
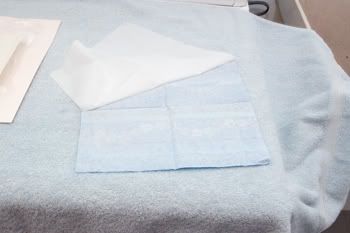
Place the napkin over the saran wrap. For the striped pattern I felt through the napkin for the edge of the card stock to assure that it was aligned straight.
Carefully place your card stock over the napkin trying not to move it.
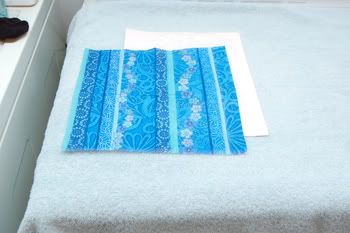
Using a medium,or cotton setting, on your iron (this was a cool iron for the pic)apply pressure to the card stock and slowly move back and forth.. to and fro.. whatever you wish, but the one thing I do have to tell you is if you have any saran wrap sticking outside your card stock try to avoid it please:) I did this and had a tiny mess on the edge of my iron. Now that's as good an excuse as any. Oh honey I'm sorry I can't iron your dress pants, because I got plastic on my iron;0
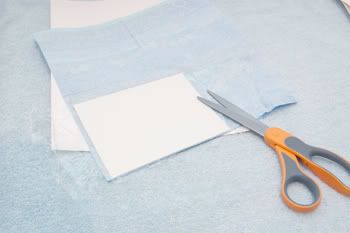
I didn't picture the next step, but as soon as you think your napkin adhered to your card stock, carefully peel the bottom and top layer away. It will be HOT.
Once your layers have been peeled away cut the excess from your card. For a cost saving measure, before you start any of this, cut the napkin down as close as you can to the size of your card.
And there you have it! Embellish as you wish, and have fun:D

Thanks for stopping by,
Sonya
1 comment:
Gorgeous Sonya!! TY for sharing your tutorial with us over at SOS!!
Post a Comment